

[This was a guest post on the lovely Emily's blog! See the original post HERE.]
So I have a confession to make - I don't actually own a DSLR (BLOGGER SHAME). And you really don't need one to have good looking photos for your blog (not saying that mine are ahmazing or anything). I'm here to show you how I take my photos from looking like sad and dark rubbish to brighter, presentable shots, that look like a DSLR could've taken them. Alrighty, time to spill my secrets!
TAKING THE PHOTO
MY CAMERA: Sanyo Xacti VPC-GH3 (an HD video camcorder from my Youtube days)
LIGHTING
I may look like I'm aimlessly browsing Tumblr/Youtube but really, I'm watching the sun like a hawk and waiting for bright, warm natural lighting to happen. Cloudy, sunny days are the best, otherwise every photo just looks like a blueberry (and I'm too lazy to adjust the colour balance).
COMPOSITION
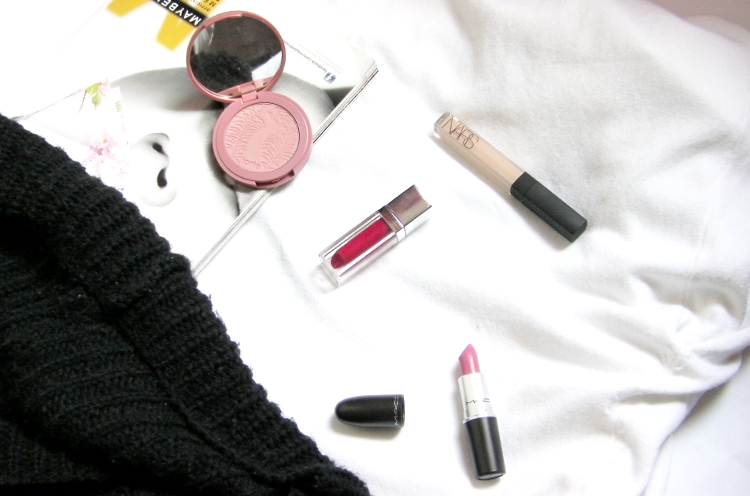
This is the part where you strategically place products at different angles in a flatlay to make it look like you effortlessly tossed everything on the ground and made it look visually appealing. Your best friends will be textures (eg. clothes, knits), magazines, flowers, anything can work. Yes I purposely bought fake flowers that cost way more than they should, just to have pretty photos. DON'T JUDGE.
TAKE MULTIPLE SHOTS
I usually take about 10 shots (I KNOW, ONLY TEN!?) from different angles. At this stage, I'd say to invest in a tripod because seriously? The number of times photos have come out blurry due to my excessive hand trembling is not even funny.
EDITING aka THE TRANSFORMATION
1. OPEN UP THE PHOTO IN GIMP
Personally, I just don't get Photoshop (TOO MANY BUTTONS) so I use GIMP 2 which is free and still has many of the same features as Photoshop.
This is how a photo looks like fresh from the camera sans editing, aka TRAGIC.

2. ADJUST CURVES
Curves is my favourite tool EVER. Just look at the massive difference it instantly makes. It just brightens up the parts that need to be brightened.

3. INCREASE CONTRAST
I usually go pretty GUNG HO with the Curves tool, so with the Brightness and Contrast option, I increase the contrast just a tad. It prevents the photo from looking washed out, eg. makes the black parts blacker and adds a bit of depth.
4. CROP AND RESIZE
I then crop out the sides using the Select Tool and resize the photo to fit the width of my blog, so it doesn't take as long to load.

DONE! Now wasn't that easy? Really, it's all about the CURVES baby *wink*
NOW MY FRIENDS: GO FORTH AND CONQUER.
Bloglovin | Instagram | Twitter